Tuesday 31 May 2016

Reflection

Reflection

Course Feeling

In General, i have to say that i am quite satisfied with my aluminium skin's for my both two assignments, one is my chosen object which is related to the architecture and another one is for the interdisciplinary skin with other student. Although both two are not as good as what the other students did. But for me, i believe i have tried my best and i really enjoy the metal making process. Working with other classmates give me quite different feelings compared with other architecture course. We worked together and chatting with each other. This kind of studying atmosphere makes me feel quite happy.It is a good course which promotes the student's social activities not just like the other course's individual assignments which doesn't require much communication between students.


Still Rememberring my excited mood when i first get into the work lab and see so many tools in the working space,i believe this course is quite suitable for me because i am really a fan of model making. Creating an object by my own hands gives me a sense of achievements. Although at the beginning of the metal making process i meet some problems and i failed many attempts, the nice classmates surrounding me give me a lot of support. we discussed with each other and solved the problems together.


Relationship to the architecture

In terms of the relationship between this course and the architecture. i think the most direct and obvious way is the model making skills especially for the curved elements in the architecture design. Under this kind of skill it allows us to think that if it is possible that we could apply some organic idea into our own design studio project and use the alunimium sheet to create the curved model.

Like what Zaha Hadid did in her almost designs and among all of her designs, my favorite one is the Heydar Aliyev Cultural Center.


Tutorial 2

Second tutorial

Shoes - Interdisciplinary Skin 


Process

Step one - Create the real model for the object

In this step the main principal is similar like the first tutorial that i have been presented before. Form 123d catch, meshmixer to the 123 make and finally use the illustrator and laser cut machine to generate the basic skeleton model.


Step two - make the metal surface

Before showing the main part of this metal sheet making, i want to use the simple word to say the initial process.  

1. Select the right the aluminium sheet with the appropriate thickness.
2. use the marker to draw the basic shape of the object on the surface of the sheet
3. cut the shape with the cutter that exist in the worklab


Main part 


For this new shape, instead of using the round hammer as the starting point to bend the sheet like what i showed in the first tutorial, i decided to use the roller first then use the hammer.


Use this hammer to shrink the outer sheet moves inward 
  

Then dividing the sheet into 3 different parts and treating these three different parts with different making methods 


First part - bottom part of the shoes 


Use the iron ball as the supporting equipment to help us make the bottom round surface

Second part - middle part of the shoes

use the wooden stake dolly and the hammer to create this part 


Third Part - Top part of the shoes

In this case there are two steel dolly that will being used the first one is to generate the general bending for this part while the second one which is much smaller is used to adjust more detailed part.


Final result


Tutorial 1

First Tutorial
Snail - Bionic architecture


Step one: Create the 3d model through the 123d catch 

 1. Download the 123d catch app from the phone's store


 2. Create an autodesk account to make sure that you could have your own database to store your 3d models.

 3. Watch the tutorials that have been given on the Internet to understand how to use this software.
                          (Below is the link of the tutorials)
 

                    http://www.123dapp.com/howto/catch


Step two: Create the real model


  1. Open your account from the 123d make official website and download your selected model

 2. Fix the model's problems by using another software which is called as the Autodesk MeshMixer to make the model becomes a solid one instead of a skin model  

( in this case you could change your model shape as well to generate a more beautiful one)  


 3. Open your finilised model with the 123d make


(In this case red pieces mean there are something wrong with this model and we have to change the numbers of the cutting pieces through the vertical and horizontal way until there is no red appears.)

Another important thing that i want to mention is the thickness option in the 123d make. In order to make it easier to assemble the model the selected thinkness should be a little bit bigger than the thickness of the material that you are going to use. Like setting 3.2mm gap to suit the 3mm thickness materials,otherwise it is quite hard to assemble the model.   

  4. Export the finilised sheet to dxf files and change the lineweight and color with the adobe illustrators. - Change the cutting line to red and the number line to blue; change the line weight to 0.001. 

  5. Assemble the whole pieces and got the final model


Step Three: Make the metal surface

                The new made metal surface


                            The original one

Process 

Draw the appropriate shape on the sheet 


       Fix the position of the sheet until the line, cutter and your eyes at the same level

First cut the square shape with the lager cutter then use the smaller one to trim it

Cut the rest part of the sheet with this cutter

Get the final round shape

    Draw the circule at the center and use the hammer that i showed above to bend it
as the first step to create a dome like shape

          (Tip: hammer from the center to the outside, round by round) 

use some other equipment in the work lab to help us create the shape 

Pictures show how to use these two equipment

(Tip: Please notice the difference between the hammers that i used before, the circular shape hammer is being used to create the first bend as the starting point while the hammer that i showed above has the smaller and rectangular shape at the top which is being used to push the sheet move inward more deeply) 

The basic shape has been created

using the Roller and shrink to make the beautiful skin 

Pictures show how to use this two equipment

(Tip: for the roller remember to change the gap between two roller to suit the thinkness of your selected sheet; for the shrinker we need to do it slowly and carefully otherwise it will be quite easily causing the sheet to crease too much. If it is over-shrinking, it is very hard to fix.)


The dome like shape then could be generated


Use the marker to draw the whorl on the surface 

Get the suggestion from the staff in the workshop and he taught me a good way to make the whorl, which is using the club to pat the surface. 


Here is the result.


Then these three hammers will be quite important for the rest metal making 


Pictures show how to utilize these three different hammers

(Tip: For different whorl gap we need to select the suitable hammer to achieve the different purpose like use the big and round one to suit the starting point of the whorl while using the smaller one to create the top of the whorl and each two hammers could being used together by cooperating with the equipment that showed in the third picture)

Also here is another tool that could being used

Final Stage: Using the square shape hammer to clean the surface of the sheet
- try to remove the hammer markers on the surface
- use the methylated spirits to clean the marker evidence
- use the sandpaper to clean the surface 


( Tip: the most important thing in this case is the sandpaper, only if you have quite successfully used the square hammer to smooth the surface, then do not use the sandpaper to clean the surface. Otherwise the surface will looks very ugly  

Final result


Tuesday 17 May 2016

Reflection

Compared with my first Project which is to create a dome-like metal sheet to cover the surface of the shell, the new one for the shoes is much more difficult than I expected. 
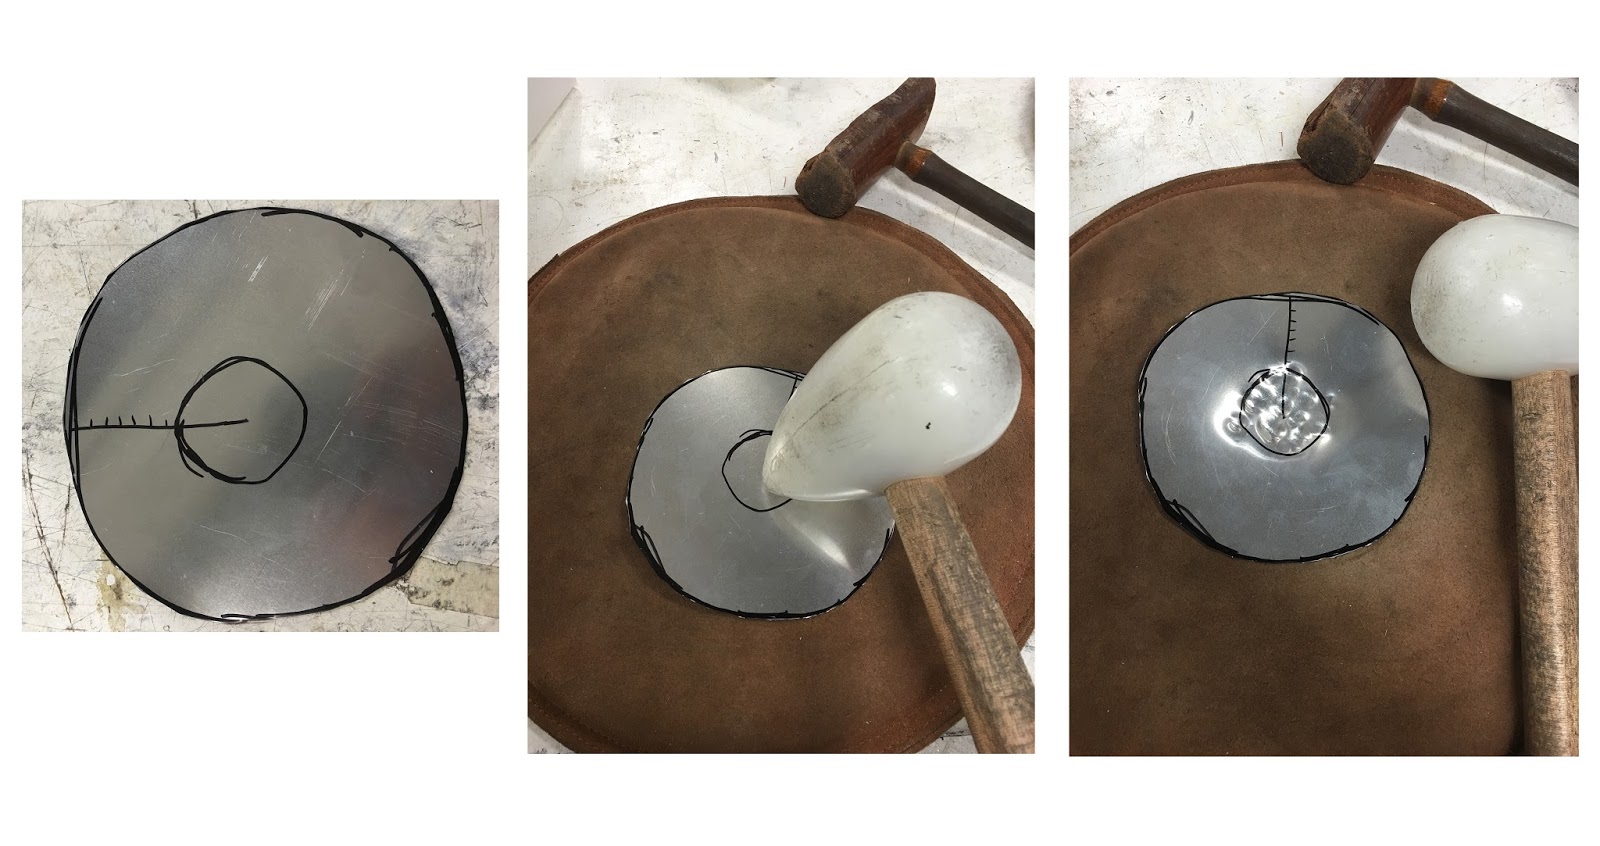
And the reason for this is for my first one, there’s only one main making principal which is to hammer the surface from the inner centre circle to the outer surface and make the whole flat metal sheet moves inward. All I need to do for the main part is to be more patient and hammer the surface slowly in a circular way. Also by cooperating with the round iron equipment that exists in the workshop, the final purpose could be easily achieved. 

While for the new one, it can be easily noticed that there are a lot of curved like surface on the shoes and more importantly, the curved direction for some part of the surface are in the opposite way like one part of the surface requires to make the round surface moves inward while for the rest attached part needs to move outward. In the case, the intersecting part of the metal sheet could be easily broken up. In order to solve this kind of conflict, I always used the maker to draw the auxiliary line on the surface with the laser cut object and slowly hammer the surface to make it as accurate as possible to suit the object.
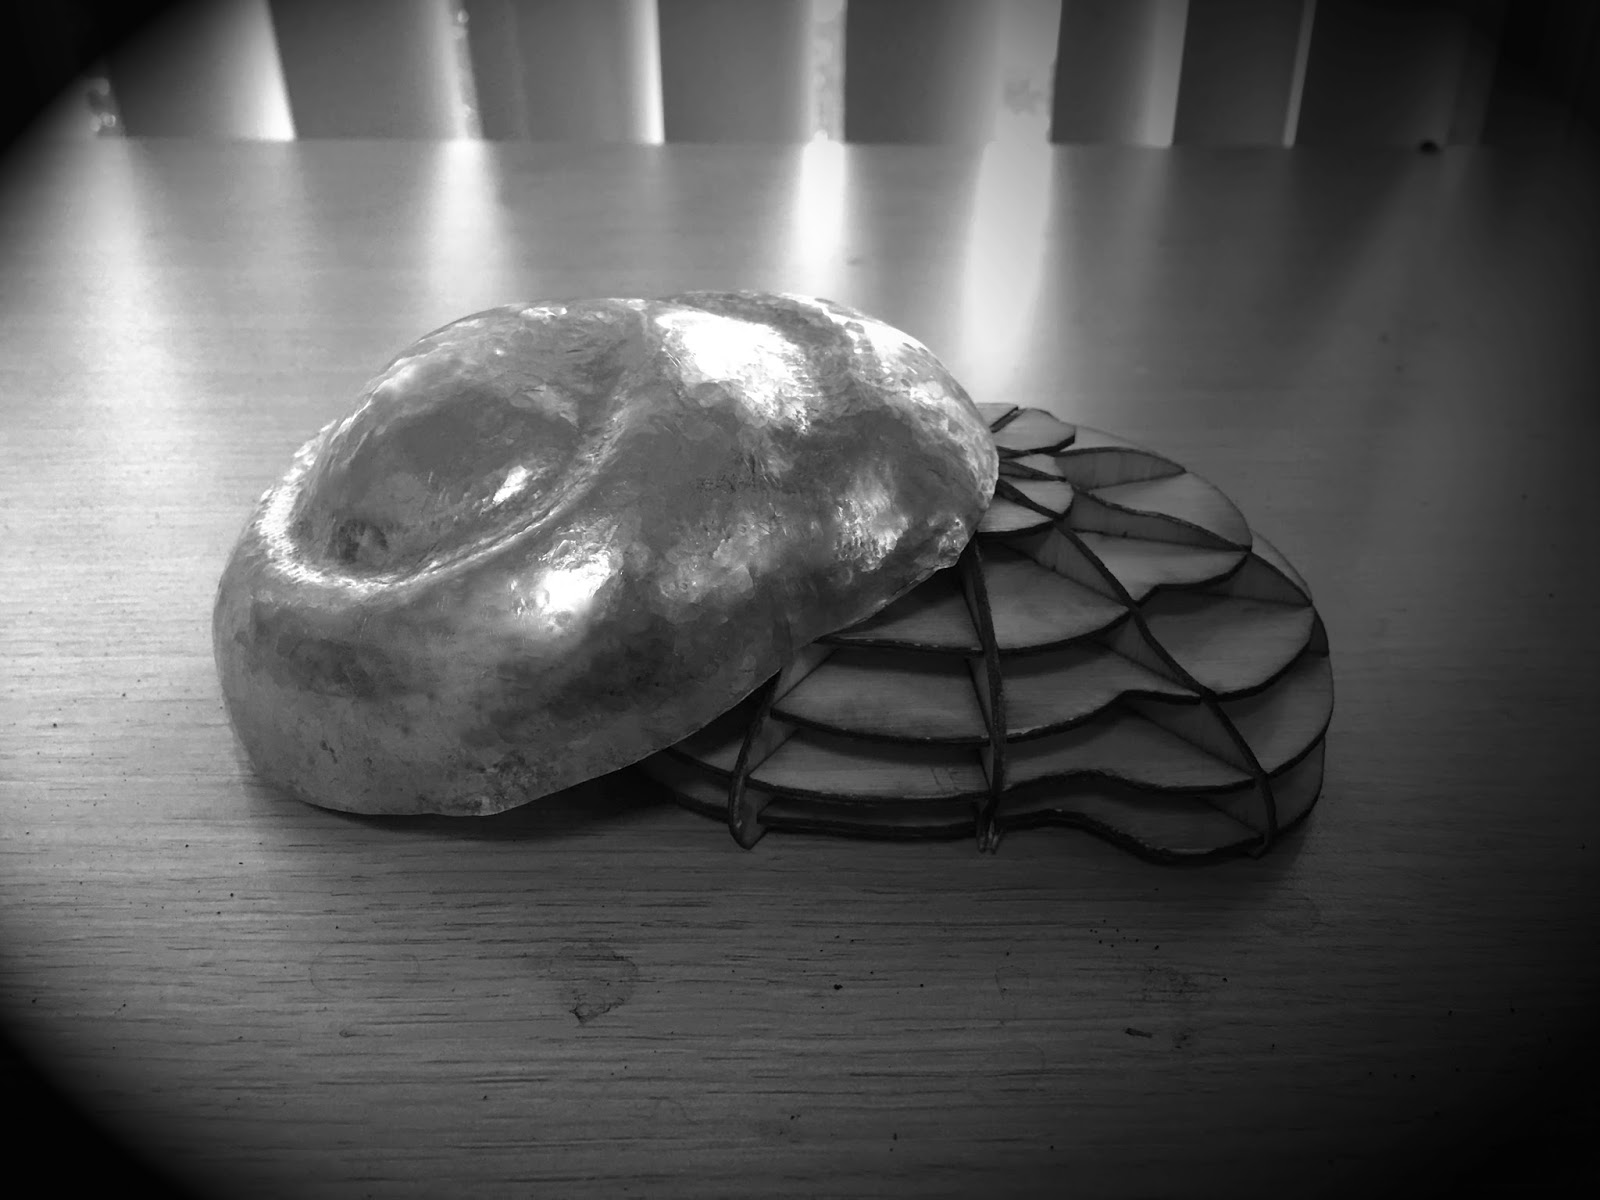
Although the final result is not as good as what I expected. I still think that if I have another chance to make this surface, I could do it better and maybe I could change another way to make the surface like to make another solid and rigid timber model for the object then I could hammer the sheet directly on the surface of the onject. I guess through this way the final surface will be better to suit. 

Overall the new one gives me a quite different experience for the metal sheet making. After this project, it actually helps me improve my metal sheet making skill and push me to learn more equipment inside the workshop.

Porject 2

                   Digital Making - Interdisciplinary Skin 

                  Process one 
                        Paired up and get the model

   
Paired up 


Cooperating with another student who study the interior architecture course. We simply shared our own adobe illustration files for the first project. For his first one. His chosen object is the basketball shoes, which was being used as the inspiration source to explodee ‘Highlight in the dark' concept for his second year restaurant interior design, with the idea of the curved surface and the dotted light.


Assembly

When started to combine every units into the whole. The first thing that we need to do is to classify two groups, one of which is called the 'Z' group with the capital 'Z' half cut on the surface. This group will be assembled in the horizontal way later for the final model. Another group is called as the 'Y' group which will be assembled in the vertical way. Then we need to interlock each two pieces with the same number like Z-1 intersect with Y-1 and etc. And after we interlock all of the different units. We will finally get the final model. 


                         Process two 
                         
                         Working Process - make the skin 


                        1. Choose the right material and cut it at the appropriate scale. 


2. Use the roller and the hammer to make the initial curved like shapes, case marker will be used to guide the way to show where the hammer should go. And the picture showed below is my initial approach.


                          3.    Use other iron ball equipment to help me get the more detailed curved                                    surface 


                              Process Three

                              Final Version